
type
status
date
slug
summary
tags
category
icon
password
📚 🚩 Getting Started
本页汇总了 🚩 Getting Started 相关的常见问题(共 11 个)
▶ Understanding Templates
Templates are the backbone of Customily, they contain all the information for
a specific product to be personalized with a specific design. Templates are
automatically created when you select a Base Product and a Design from the
Start menu, by combining the two of them. You can also create templates from
scratch by manually inputting all the information for your personalized
product (print file, design, mockup images, etc.).
Templates contain all the information about your final product and have two
main components. The print file settings, where you configure everything
pertaining to the way the product will be printed (print size, format, quality, etc.), and the preview settings where you configure the interactive
mockup customers will see on your storefront.
Print file settings
The print file (also referred to as the production file) has all the
information that will be used to generate the file ready for printing or
engraving. It will contain all the personalized elements of the design (such as texts and cliparts), and any other elements that are important for printing
(such as margins or crop marks) laid out on a canvas that is your print file.
You can learn more about Print file settings
here.
##
Preview settings
The preview is the interactive mockup that will be visible in your store. It
will contain all the personalized elements of the design placed on actual
pictures of the product. Any accessory elements that were needed for printing
(like crop marks) can be hidden from the preview, and you can also add extra
elements (such as texture masks or effects) to make the preview as realistic
as possible.
You can learn more about Preview settings
##
What is the difference between Templates, Designs, and Base Products?
When choosing a Base Product and a Design, you are combining them to create a
Template. Essentially, the Design gets placed inside the Product Base on both
the print file and the mockup. This results in a Template that has perfect
Print file and Preview settings.
Therefore, when you're publishing a product by choosing a Base Product and a
Design, you can manually edit the end result by editing the Template.
At the end of the day, Designs and Base Products are an efficient and hassle- free way of creating Templates because you don't have to manually input the
print file and preview settings for your products every time. This is
especially useful if you sell multiple versions of the same product with
different designs (such as t-shirts for different occasions) or if you offer
the same design across a wide range of products.
A view of a complete template, with the design placed in the product's print
file on the left, and in the mockup on the right.
▶ Understanding Store
Store is the place where you can browse through your Shopify listings and
connect them with the Templates from Customily.
When publishing a product from Start (by choosing a Base Product and Design)
the listing is automatically connected to the Template. However, if you are
creating a Template manually, store is the place where you'll go to connect
that template with a listing from your store.
Once a listing is connected to a Template, it will show the interactive
preview and the personalization options on the storefront.
Under Store, you'll also find all the settings regarding your storefront, like
how personalization options and previews are displayed.
There are two main sections in Store, Products and Option Sets.
Products
When going to Products you'll see all the products (listings) from your store.
You'll easily identify if they are already connected with Customily or not. By
selecting a product, you'll be able to connect it with a Template to add
personalization to it.

Option Sets
Option Sets are the personalization options your product will have. When
manually connecting a product to a Template, you'll also assign to it an
Option Set (although this is done automatically most of the time, so you don't need to stress about it!).
These Option Sets are the actual swatches, dropdown menus, and text inputs
that shoppers will see when they view your product. So, if you want to modify
any of these options (such as making a particular option required or changing its title), this is the place to do it.
Important
"Store" is only available for Shopify , WooCommerce, and Etsy
stores. If you are using a different eCommerce platform, head over to
integrations to see where to find Store functionalities inside your App.
▶ Supported browsers
To make sure that Customily's design studio runs smoothly, use it on a
desktop device with Google Chrome.
All supported browsers for Customily are:
- Google Chrome
- Safari
- Firefox
Important
Customily supports live stores in any browser and device. However, the
Design Studio compatibility is limited to the browsers mentioned above.
▶ Moving around Customily
Once you log in to Customily, you will see a side menu where you can browse
between different parts of the App. Let's take a quick look at it so you can
see where to find what.
Depending on what eCommerce platform you are using, your menu can slightly
change. In general the different sections are:
- Start
- My Designs
- My Product Bases
- Templates
- Libraries
- Store
- Orders
- Account
- Support
Click on any section to learn a bit more about it.
Start
In the "Start" section (represented by a rocketship), you can quickly create a
new product for your store by using information from various POD suppliers or
your own products, and by placing a design from Customily's design gallery or
your own designs on them.
My Designs
In "My Designs", you can easily create unique designs that can be applied to
your products. Using the Customily Editor, you can incorporate your own
artwork, such as text, clipart, images, and more to create designs that are as
simple or intricate as you desire.
My Product Bases
If you don't use products from a POD supplier, you can create your own
products on "My Product Bases". Here you can input all the necessary details
for creating print files and mockups for your products.
Important
"Start", "My Designs", and "My Product Bases" are only available for
Shopify and Etsy.
Templates
"Templates" are the backbone of Customily, they contain all the information
for a specific product to be personalized with a specific design. When you
select a product and a design from the Start menu, they are combined to create
a template.
Templates contain all the information about your final product, including
print file specifications and the interactive mockup that customers will see
in your store.
You can edit templates that were created using the "Start" feature, or you can
create templates from scratch by inputting your print file information and
designs directly.
Libraries
Libraries are collections of assets you can use across your designs and
templates. You can create clipart, fonts, colors, and vector libraries, and
easily organize them into categories simply by uploading your files in them.
Store
In the "Store" section you can browse through your Shopify listings, and
connect them with Customily. You'll also find all the settings regarding your
storefront, like how personalization options and previews are displayed.
Important
"Store" is only available for Shopify, WooCommerce, and Etsy. If you
are working with Magento or BigCommerce , you will find the "Store"
section on the Customily extension installed on your store. If you have a
Custom Integration , instead of "Store" you will see it as "Manage
Options".
Orders
Head to the "Orders" section, to view a list of all your Orders made with
Customily. You can revise each order's personalization details and print
files, and, if necessary, update them before sending them to print.
Important
"Orders" is only available for Shopify.
Account
In "Account" you can view and edit your username, password, and API key, as
well as manage your billing and payment methods.
Support
A fast way to access our help center and contact our support team.
▶ How to access Customily
Depending on what platform you are working with, you can sign in to use
Customily in a couple of different ways.
Select your platform below and follow the steps to log in to your Customily
account.
- Shopify
- Etsy
- WooCommerce
- BigCommerce
- Magento
- Walmart DSV
- Wix
- Custom
- Others
Shopify
- Log in to your Shopify store and go to your Shopify Admin Panel
- Go to Apps > Customily Product Personalizer
- That will open your Customily account on a new tab
WooCommerce
- Log in to your WordPress site
- On the left menu go to WooCommerce > Customily
- Click on Launch Customily
You can also access customily for your WooCommerce directly with your account
information as explained below.
Other Platforms
- Type in your username or email address and your password
- Click Sign In
Forgot your password?
Don't worry, click on forgot password, and enter the email address associated
with your account. You'll receive an email with instructions to reset your
password. If you don't recall what email was associated with your account
reach out to our support team.
▶ How to add Customily to your store
Customily offers seamless and user-friendly integration with the most
important e-commerce platforms. Select your e-commerce platform to get
instructions on how to install Customily in your store :
- Shopify
- Etsy
- WooCommerce
- BigCommerce
- Magento
- Walmart DSV
- Wix
- Custom
- Others
Shopify
- Go to the[Customily page on the Shopify App Store](https://apps.shopify.com/customily-options-3)Customily page on the Shopify App Store**.
- Click on Add app.
- Log-in or sign-up to Shopify.
- Click on Install app.
- Approve to start your free trial.
Important
A new Customily account associated with the shop will be created automatically
when you install the app. To access Customily design studio,**go to your
Shopify admin panel > Apps > Customily
**
Etsy
###
Creating your account
- Go to the[Customily Etsy site](https://www.customily.com/pricing-etsy)Customily Etsy site**.
- Click on Try it for free.
- Create your account.
- Add your billing information (don't worry you won't be charged until your trial ends).
Tip
If you already have a Customily account that you use on another store, instead
of creating a new account click on **Already have an account? Click here
instead to let us know!** So we can add your Etsy store to your existing user
Connecting with your Etsy
- Sign in to [Customily](https://app.customily.com/singin)Customily** with your username and password.
- On the left menu, go to Store orStart(the rocket ship!).
- Click on Connect Customily on Etsy_...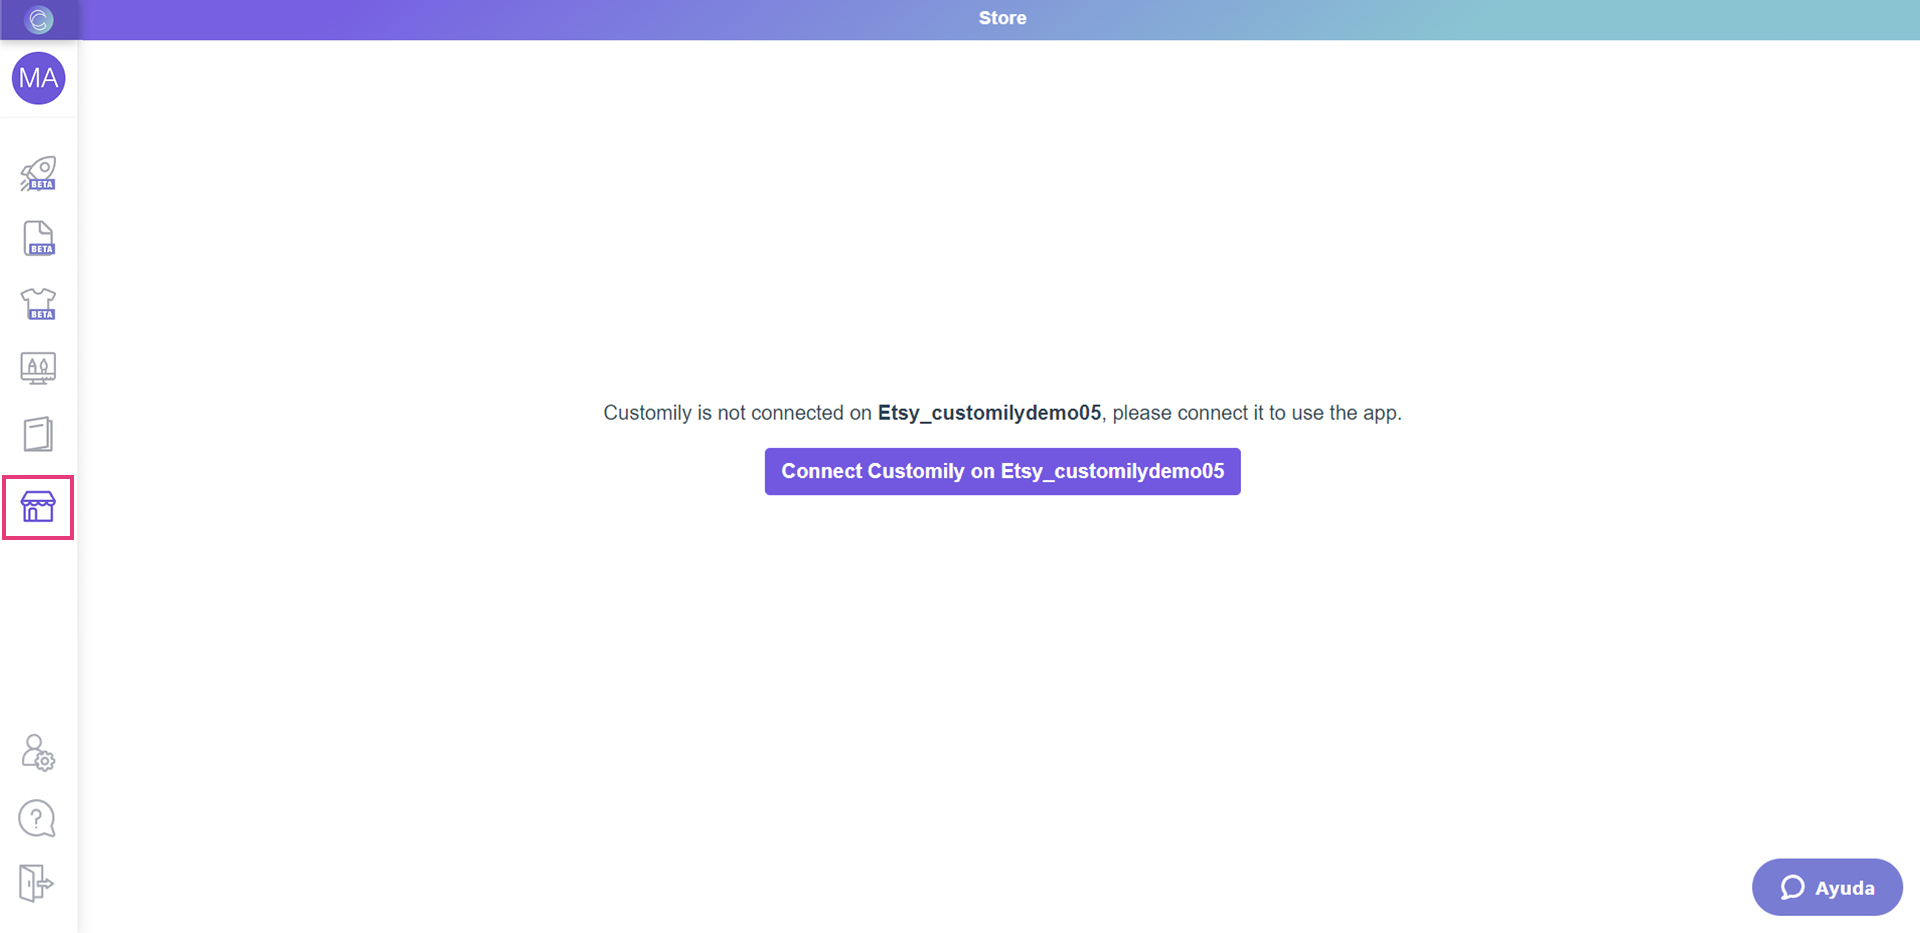connect.jpg**
Important
If you have more than one store on your user, make sure you select your Etsy
store from the dropdown at the top left to be able to see the **Connect
Customily on Etsy button.

**
- This will open a new tab with your Etsy account. If you are not logged in, you will be asked to log in to your Etsy account.
- Once you are signed in, it will let you know that an application would like to connect to your account. Scroll to the bottom of the notice and allow access. !Screenshot
WooCommerce
Creating your account
- Go to the[Customily WooCommerce site](https://www.customily.com/pricing-woo)Customily WooCommerce site**.
- Choose a plan and click on Subscribe.
- Add your billing information.
- Create your account.
- You'll receive an email with installing instructions, including the plugin you'll need to install on your WooCommerce. Download the plugin from the email.
Installing the Plugin
- Log in to your WordPress site.
- Go to Plugins > Add New > Upload.
- Upload the plugin(zip file) you downloaded from the email.
###
BigCommerce
Creating your account
- Go to the[Customily BigCommerce site](https://www.customily.com/pricing-bigcommerce)Customily BigCommerce site**.
- Choose a plan and click on Subscribe.
- Add your billing information.
- Create your account.
Installing the App
- Go to the[Customily page on the BigCommerce App Store](https://www.bigcommerce.com/apps/customily-options/?search=Customily)Customily page on the BigCommerce App Store**.
- Click on Get this app.
- Log-in or sign-up to BigCommerce.
- Click on Install.
##
Magento
Creating your account
- Go to the[Customily Magento site](https://www.customily.com/pricing-magento)Customily Magento site**.
- Choose a plan and click on Subscribe.
- Add your billing information.
- Create your account.
- You'll receive an email with installing instructions, including the extension you'll need to install on your Magento. Download the plugin from the email.
Installing the Extension
- Unpack the .zip file you’ve downloaded.
- Connect to the server where the website source folder is located with FTP/SFTP client (WinSCP, Filezilla, Cyberduck, etc).
- Go to upload > app and upload the files from the app folder to the root app folder of your Magento website using ‘Merge’ upload mode. This way, your FTP/SFTP client will only add new files.
- Connect to your Magento directory with SSH.
- Run the next commands:
php bin/magento setup:upgrade - to install the extension
php bin/magento setup:static-content:deploy - to deploy static view files.
php bin/magento setup:static-content:deploy - to deploy static view files.
If you use the default or developer mode, you can skip the last 2 commands.
Important
The extension is compatible with Magento 2. If you are using a previous
version of Magento, please contact our support team for detailed instructions.
Connecting with Customily
- Open your Magento backend.
- Go to Stores > Configuration > Customily > Api Settings.
- Add your Customily API Key. See where you can find your Customily API key here. !image \(4\).png
- Save Config
Walmart DSV
Creating your account
- Go to the[Customily Walmart site](https://www.customily.com/pricing-walmart)Customily Walmart site**.
- Choose a plan and click on Subscribe
▶ What is Customily?
**Customily is a design tool that makes it easy for eCommerce stores to sell
custom and personalized products.**
With Customily, you can offer interactive previews of your personalized
products in your store, and automatically connect them to fulfillment, whether
it is through a POD/printing partner or on your own printing facilities.
If a product in your store is customizable, the live preview will reflect the
choices made by the customer, providing a realistic image of how the final
product will look like.
Once your customer makes their purchase, a print file with all their choices
will be created and sent to fulfillment automatically, so you don't have to
worry about order management.
By using print-on-demand services that are connected to an API, the
fulfillment process becomes automated. This guarantees that when an order is
received, all necessary information, including the print-ready file, is
quickly sent to the correct POD provider for fulfillment and shipping.
Customily also provides a way for you to automate your design process. Our
exclusive Design Library offers a variety of designs that you can use on your
products out of the box, as well as an extensive clipart collection you can
use to create your own unique artwork.
All in all, Customily offers a convenient solution for creating personalized
products. Simply select a product from a print-on-demand supplier, add to it a
design, and publish it through the app. This process is fast and easy and
ensures the highest quality for your customized merchandise.
▶ Understanding Designs
Designs are the artwork that can be added to the products. They come in many
styles and themes and are the key to customizing a product. Customily provides
an extensive collection of ready-made designs in our Design Gallery, and you
can also create your own unique designs using your artwork.
Designs can be applied to any kind of product, whether it is from a POD
provider or your own products. The best thing about designs is that they
automatically adjust to fit the size requirements of the product you are using
them on. This means that you can use the same design across multiple products,
from small items like mugs to larger ones like blankets.
Here we can see the same design, applied to three completely different
products.
My Designs
In "My Designs", you can easily create unique designs that can be applied to
your products. Using the Customily Design Studio, you can incorporate your own
artwork, including text, cliparts, images, and more to create designs that are
as simple or complex as you wish.
Upon opening "My Designs" you'll see a list of all the designs you've created
from the oldest to the newest. You can edit, clone, and delete designs from
the list.
You can also create new designs right there.
My Designs Studio
When creating or editing a My Design, you'll head to the Design Studio. There
you'll create your design by adding various elements such as texts, clipart
libraries, maps, and more onto your canvas. With these tools, the
possibilities for unique and diverse designs are endless.
Important
My Designs are only available for stores on Shopify and Etsy.
▶ Understanding Product Bases
Product Bases are products provided by POD fulfillment services to which you
can add Designs. These products are configured to make the process of adding a
Design to them super simple, as they include all the information needed to
sell them, including print file requirements, variants (like colors and sizes), and mockups.
Product bases can have any kind of Design applied to them, whether it's a
Design from Customily's Design Gallery or your own unique Design. The best
thing about Product Bases is that they already include all the variants a
product offers, with their mockups ready. So you don't have to worry about
where to place the Design for the product to print correctly, Customily
already knows that!
Here we can see the same product with multiple Designs applied to it. If you
sell many items of the same product but with different Designs, using a
Product Base makes publishing those products a breeze.
If you want to offer products from a POD supplier you can't find on Customily,
or without any supplier at all (for example if you use your own original products), then you can create them with "My Product Bases". There you'll be
able to input all the necessary details for creating print files and mockups
for your products.
My Product Bases
In "My Product Bases", you can configure your own products to be able to use
in your store, where you'll be able to input all the necessary details for
creating the print files and use your own original images to create beautiful
mockups of your products.
Upon opening "My Product Bases" you'll see a list of all the product bases
you've created from the oldest to the newest. You can edit, clone, and delete
them from the list.
You can also create new product bases right there.
My Product Base Studio
When creating or editing a My Product Base, you'll head to the Studio. There
you'll start by setting your product's print dimensions, and its print area
(where designs will be placed). Then you'll continue by adding the mockup
images and all the necessary variants for the product. With easy steps, you
can configure any kind of product and have it ready to use in your store in
seconds.
Important
Product Bases are only available for stores on Shopify and Etsy.
▶ Understanding Libraries
Libraries are collections of assets that can be used on Designs and Templates.
There are various types of assets that can be used to create libraries, such
as color, font, vector, and clipart/image libraries.
When a library is used in a Design, customers will be able to choose from the
different assets within that library to customize their product.
For instance, if you create a clipart library with hair options, customers
will have the ability to browse through those hair options and choose what
they like.
A look at a hair library with 4 different categories, and cliparts inside the
categories.!libraries.png
And a view of how the customer will choose assets from that library once it's
used in a product. !library options.png
The best thing about libraries is that they can be used across multiple
designs, and whenever an update is made to a library, it will be reflected
across all designs that use that library. For example, if an extra hair option
is added to a hairstyle library, all designs using that library will be
automatically updated with the new hair option.
Libraries also allow for great asset organization through the use of
categories, so shoppers can have a wider range of choices in a more organized
manner.
▶ Understanding Orders
In the Orders section, you can browse through all the orders received from
products using Customily. Each order will have complete information regarding
the purchase such as order number, date of purchase, and customer details.
Additionally, it will contain details about the product and its
personalization including chosen variants and personalization options,
quantity, preview image, and print file. If the product is from a POD
provider, this information will also be included.
Order details
When selecting an order you'll be able to see the order's personalization
details. These are all the personalization options the customer selected.
These details are presented interactively, allowing you to modify them if
necessary. For example, if a customer notifies you of an error after
submitting his order, you can adjust that on the order details page and
regenerate the print file to ensure the corrected version is sent to
production.
Important
The "Orders" section is only available for users with stores on **Shopify,
Etsy , andAmazon.**
- Author:EcomGrace
- URL:http://ecomgrace.com/article/2d935142-581f-81d8-9bf8-d788f034b158
- Copyright:All articles in this blog, except for special statements, adopt BY-NC-SA agreement. Please indicate the source!